Hands-on with Jenkins
Hi!
Today i will hands-on jenkins from installation using terraform to implementation create one job. I will show how to install Jenkins on GCP using Terraform and create a simple job. This post is part of my DevOps learning journey. I will share my experience and knowledge about DevOps tools and practices.  😃
😃
Introduction
Jenkins is one of the most popular open-source automation servers. Mostly used for CI/CD pipelines integration with various tools and services. It is highly extensible and can be used for a wide range of automation tasks.
- Techstack: Jenkins, Terraform, GCP, Git
- Terraform Code: provisioning-jenkins
Overview Project
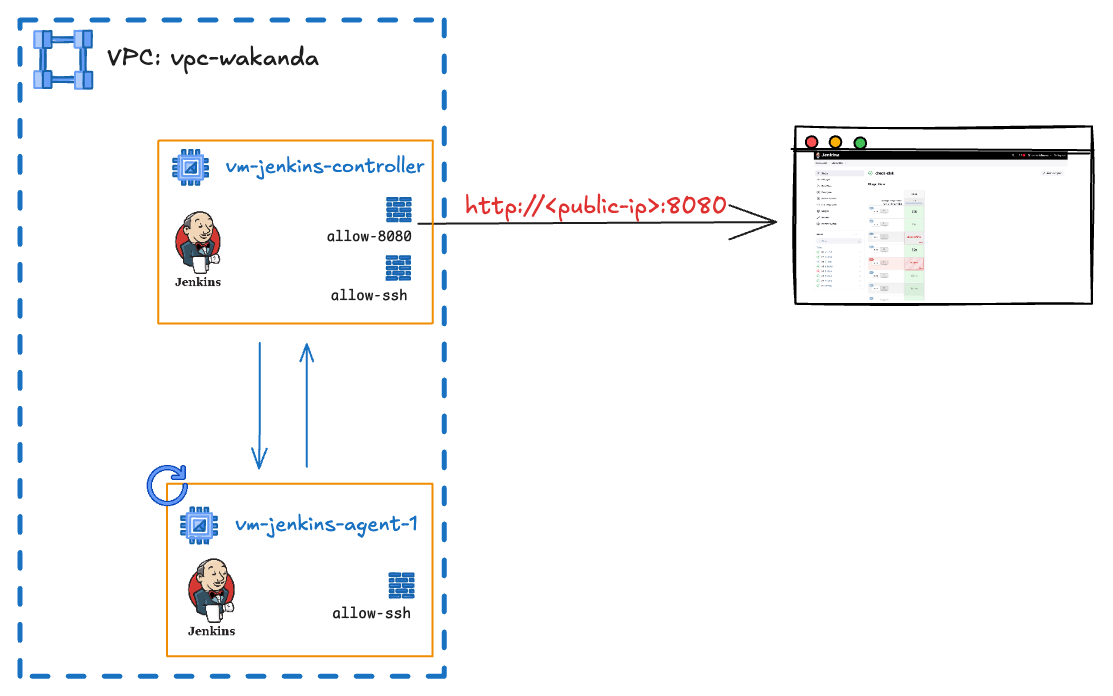
In the overview above, you can see we're using 2 VM instances: Jenkins Controller and Jenkins Agent. Typically, you could use just 1 VM instance for both Jenkins Controller and Agent. However, we're using 2 separate instances to make our setup more scalable and flexible. This approach allows us to easily add or remove agents as needed based on our workload requirements.
We will create 2 VMs on GCP using Terraform:
- Jenkins Controller: This is the main server that runs Jenkins and manages the CI/CD pipeline.
- Jenkins Agent: This is a worker node that runs the jobs defined in the pipeline.
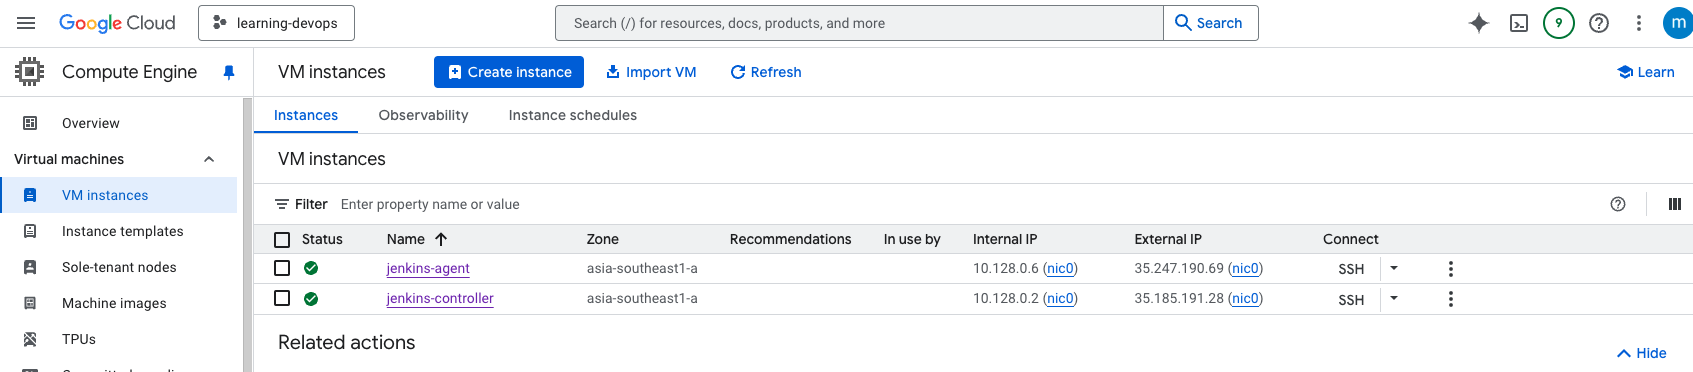
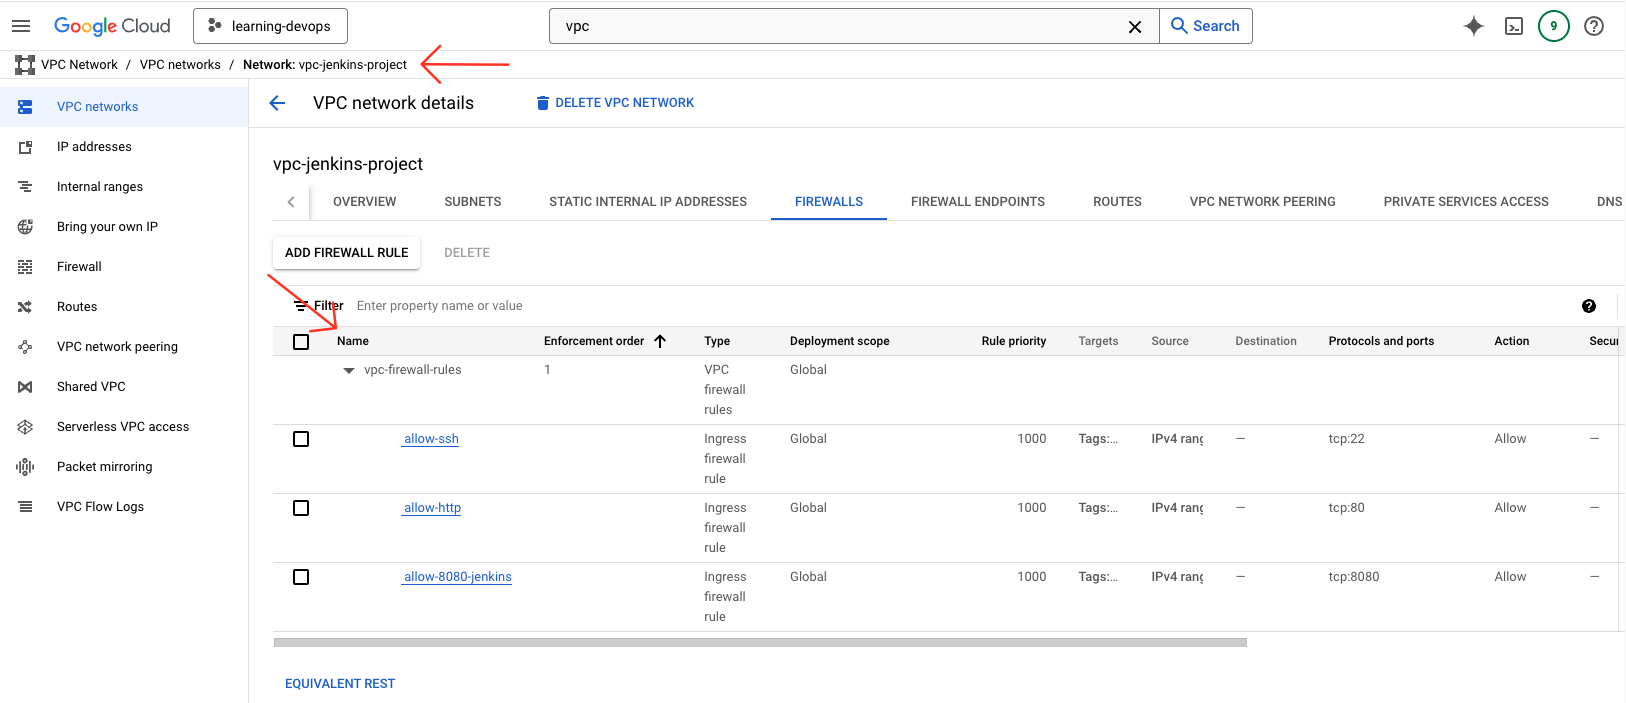
Create VM Instances on GCP
I have created a VM on GCP using Terraform. Howeever, i will not go into details of Terraform in this post. You can refer to my code repository for the Terraform code.
Install Jenkins via Terraform on GCP
At this stage, i will first install the Jenkins Controller. After the VM instance is successfully created, the startup script we defined in Terraform will be executed automatically. We'll use this startup script to install Jenkins and its dependencies. Here's the startup script that installs Jenkins:
startup_controller.sh
This script will be executed on the Jenkins Controller VM. It will install Jenkins and its dependencies. The script mainly does the following:
- Install Pre-requeste Java 21: Java Support Policy
- Install Docker
- Install Jenkins
- Add jenkins user to docker group and restart jenkins service
- Before installing Jenkins, we need to install Java 21 as a prerequisite. We will use OpenJDK 21.
- We will install Docker on the Jenkins Controller VM. This is optional, but it is recommended to use Docker for running Jenkins jobs.
- We will add the jenkins user to the docker group so that jenkins can run docker commands.
- Restart Jenkins service after adding jenkins user to docker group.
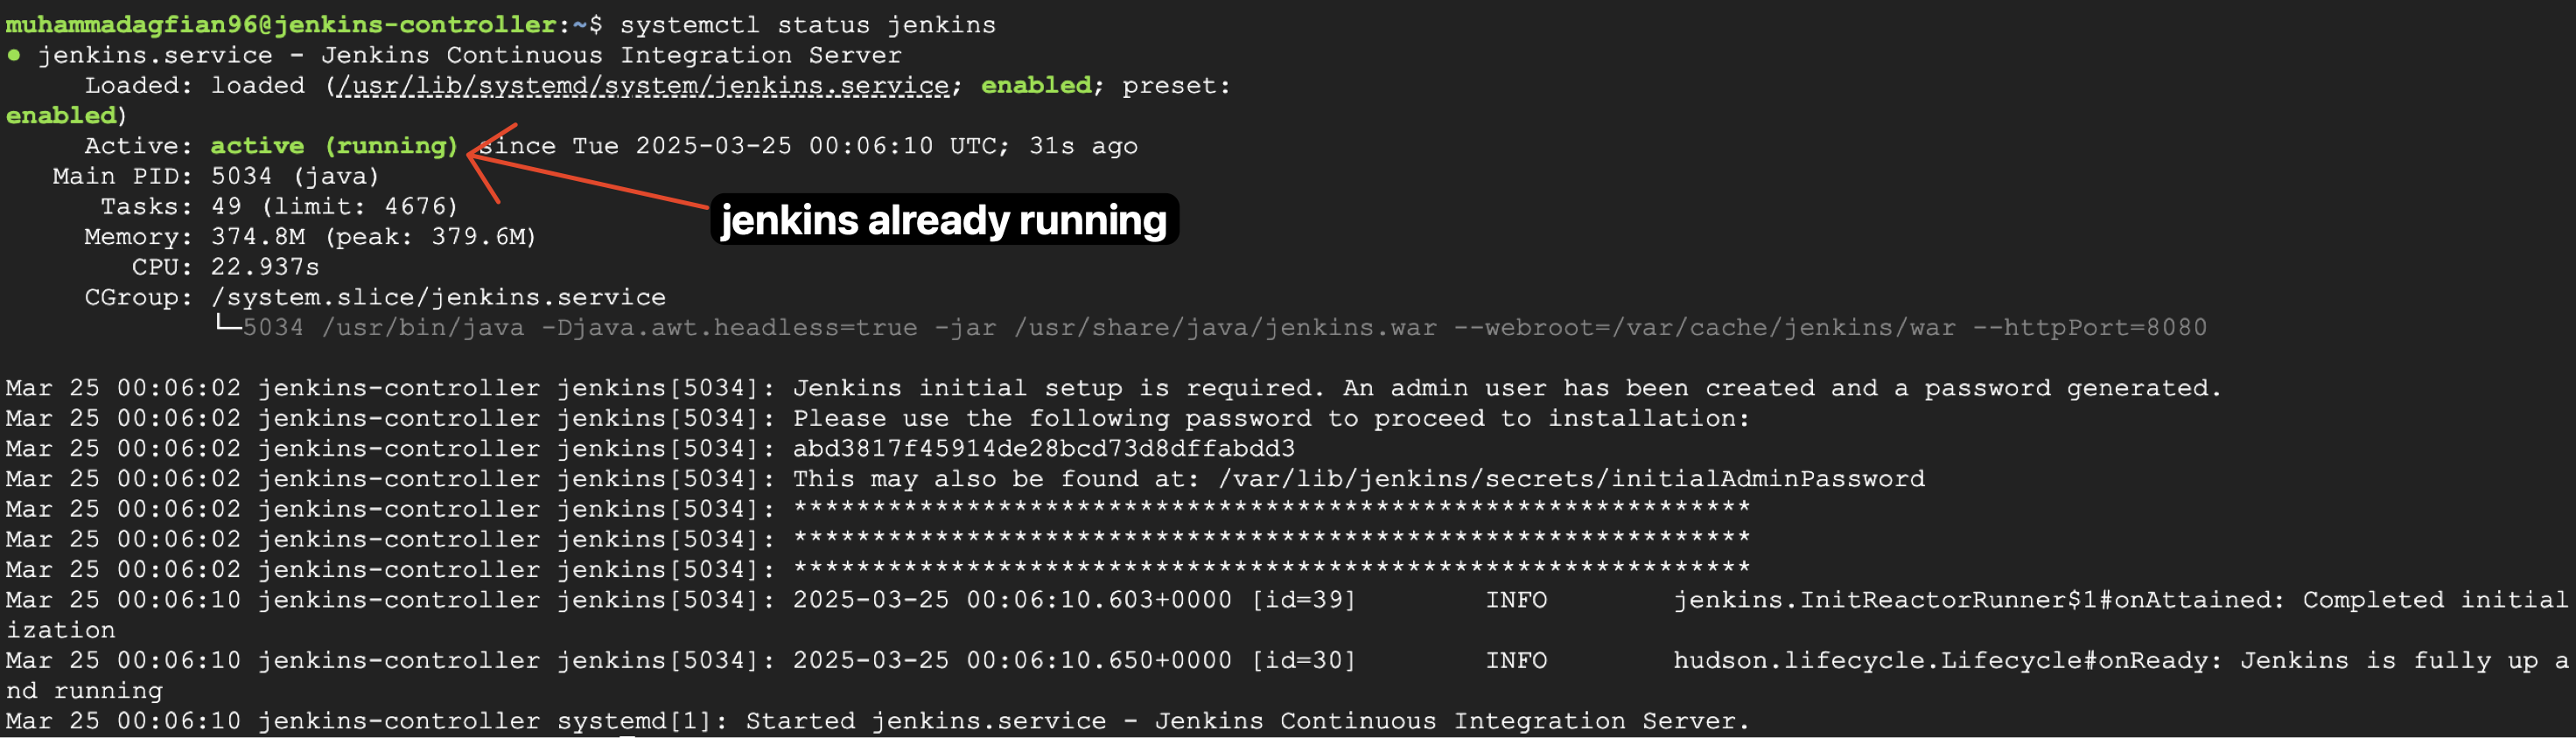
After executing you can see the status of jenkins using systemctl status jenkins command. The result as image below:
Not create agent instance at the same time
Here, we can't running terraform to directly create instance for controller and agent at the same time. This is because the agent will need to connect to the controller using name-agent and secret that need to be setup first on Controller. So we need to create the controller instance first and then create the agent instance.
My way, is comment the agent instance in the terraform code and run terraform apply. After the controller instance is created, i will uncomment the agent instance and run terraform apply again with take name agent and secret that already created in the controller instance. This will create the agent instance and connect it to the controller instance. This is the bash script to create agent instance on controller:
startup_agent.sh
This script will be executed on the Jenkins Agent VM. It will install Java 21 and other dependencies. The script mainly does the following:
- Install Pre-requeste Java 21: Java Support Policy
- Install Git
- Install wget
- Install curl
- Download agent.jar from Jenkins Controller
- Start Jenkins Agent using WebSocket
Setup Jenkins
1. Setup Controller
After the Jenkins Controller VM is created and Jenkins is installed, we can access Jenkins using the external IP address of the VM. The default port for Jenkins is 8080. You can access Jenkins using the following URL:
1. Unlock Jenkins
-
After accessing the URL, you will see the following screen. You need to unlock Jenkins using the initial admin password. The password is stored in the file
/var/lib/jenkins/secrets/initialAdminPasswordon the Jenkins Controller VM. You can get the password using the following command: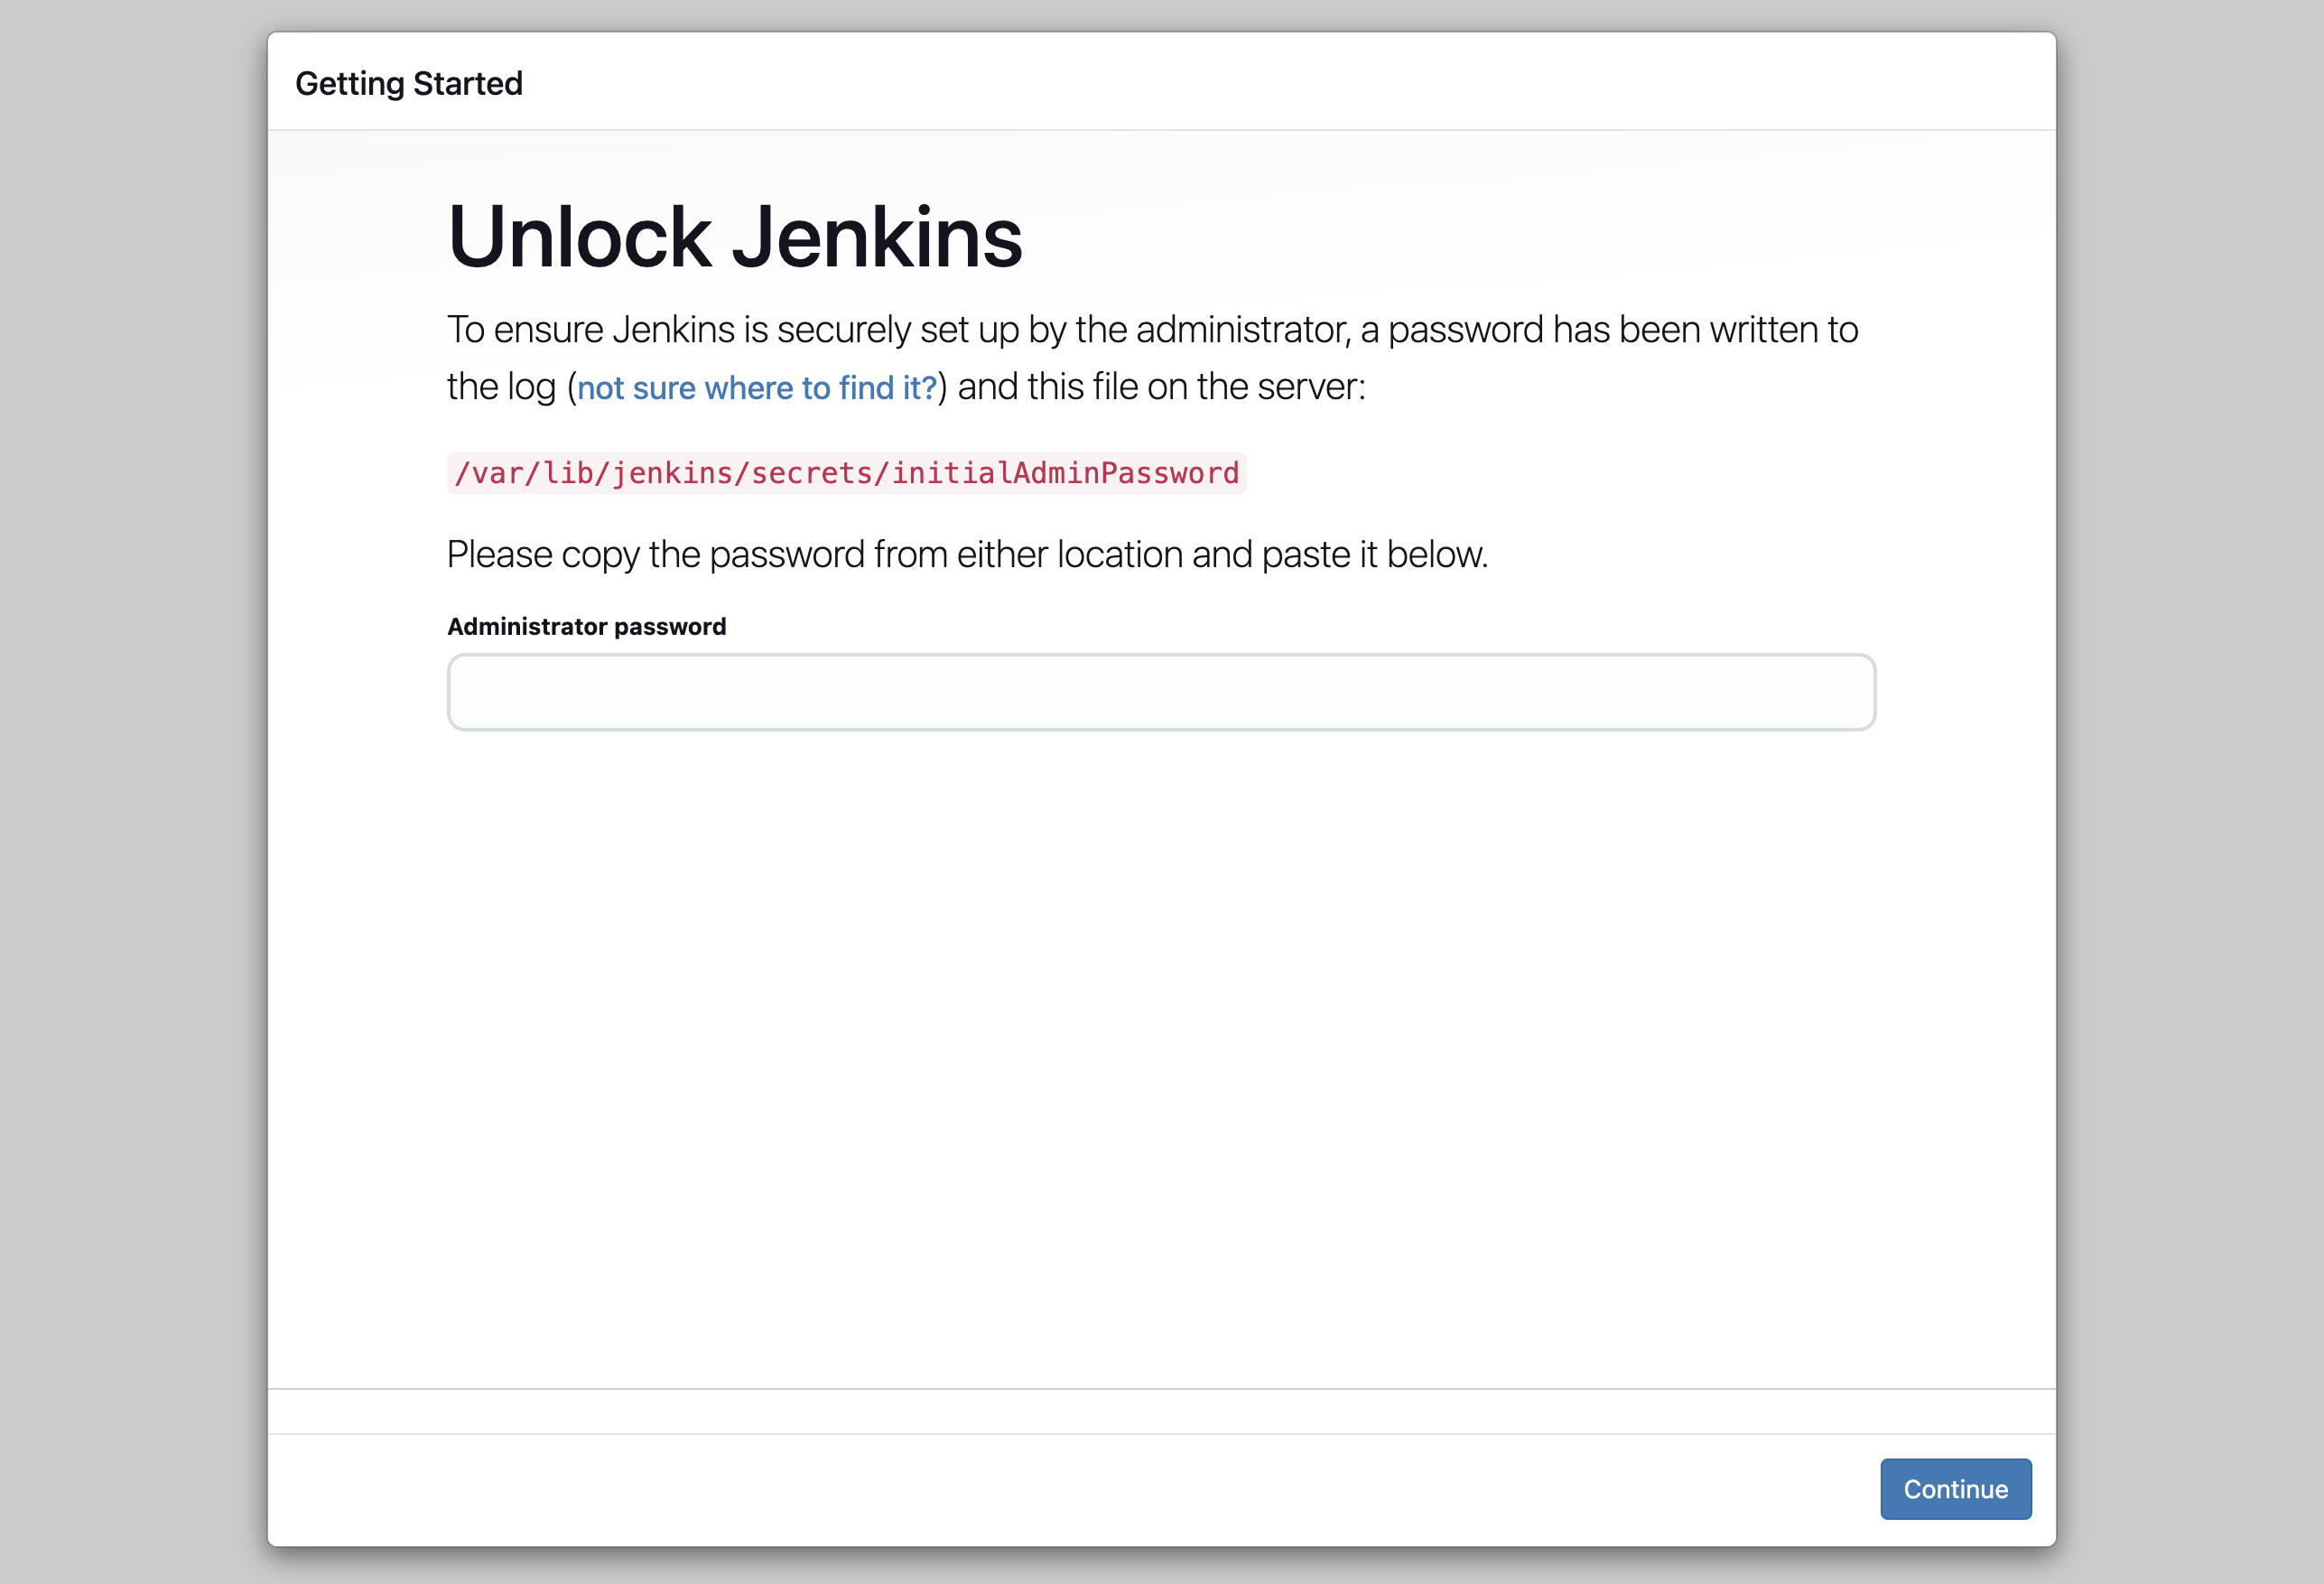

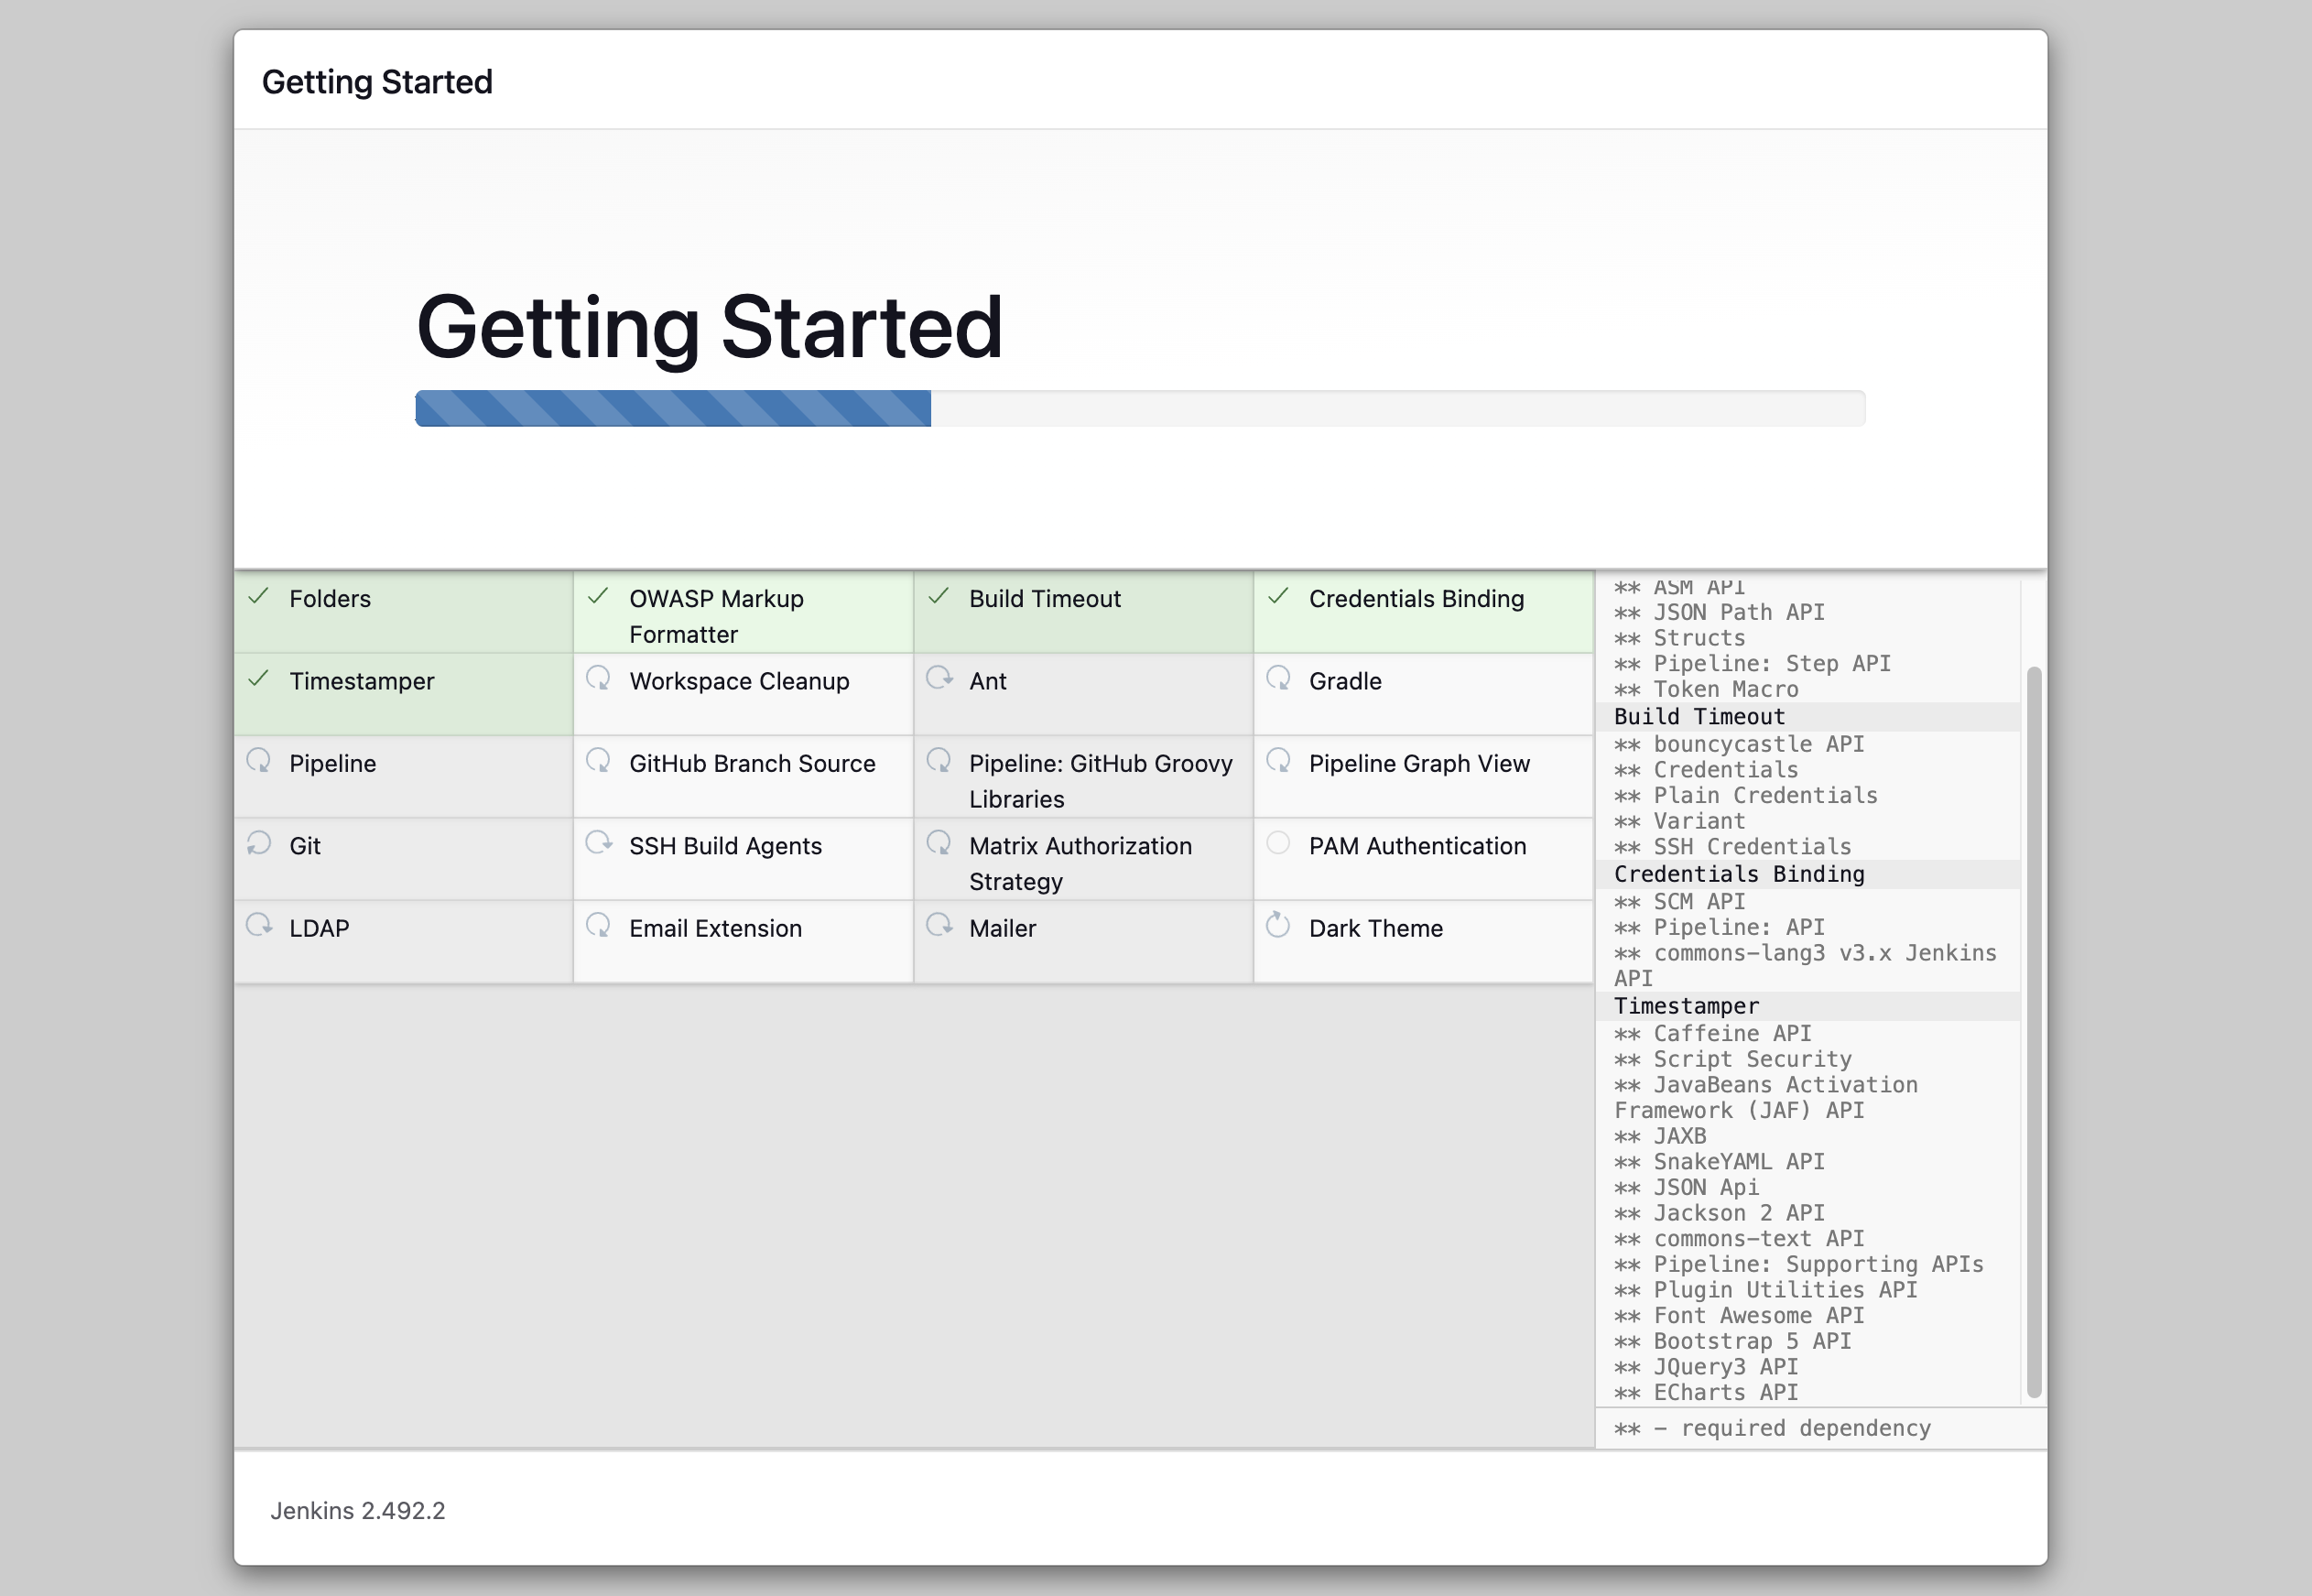
2. Install Suggested Plugins
-
After unlocking Jenkins, you will see the following screen. You can install the suggested plugins or select the plugins you want to install. For this tutorial, we will install the suggested plugins.

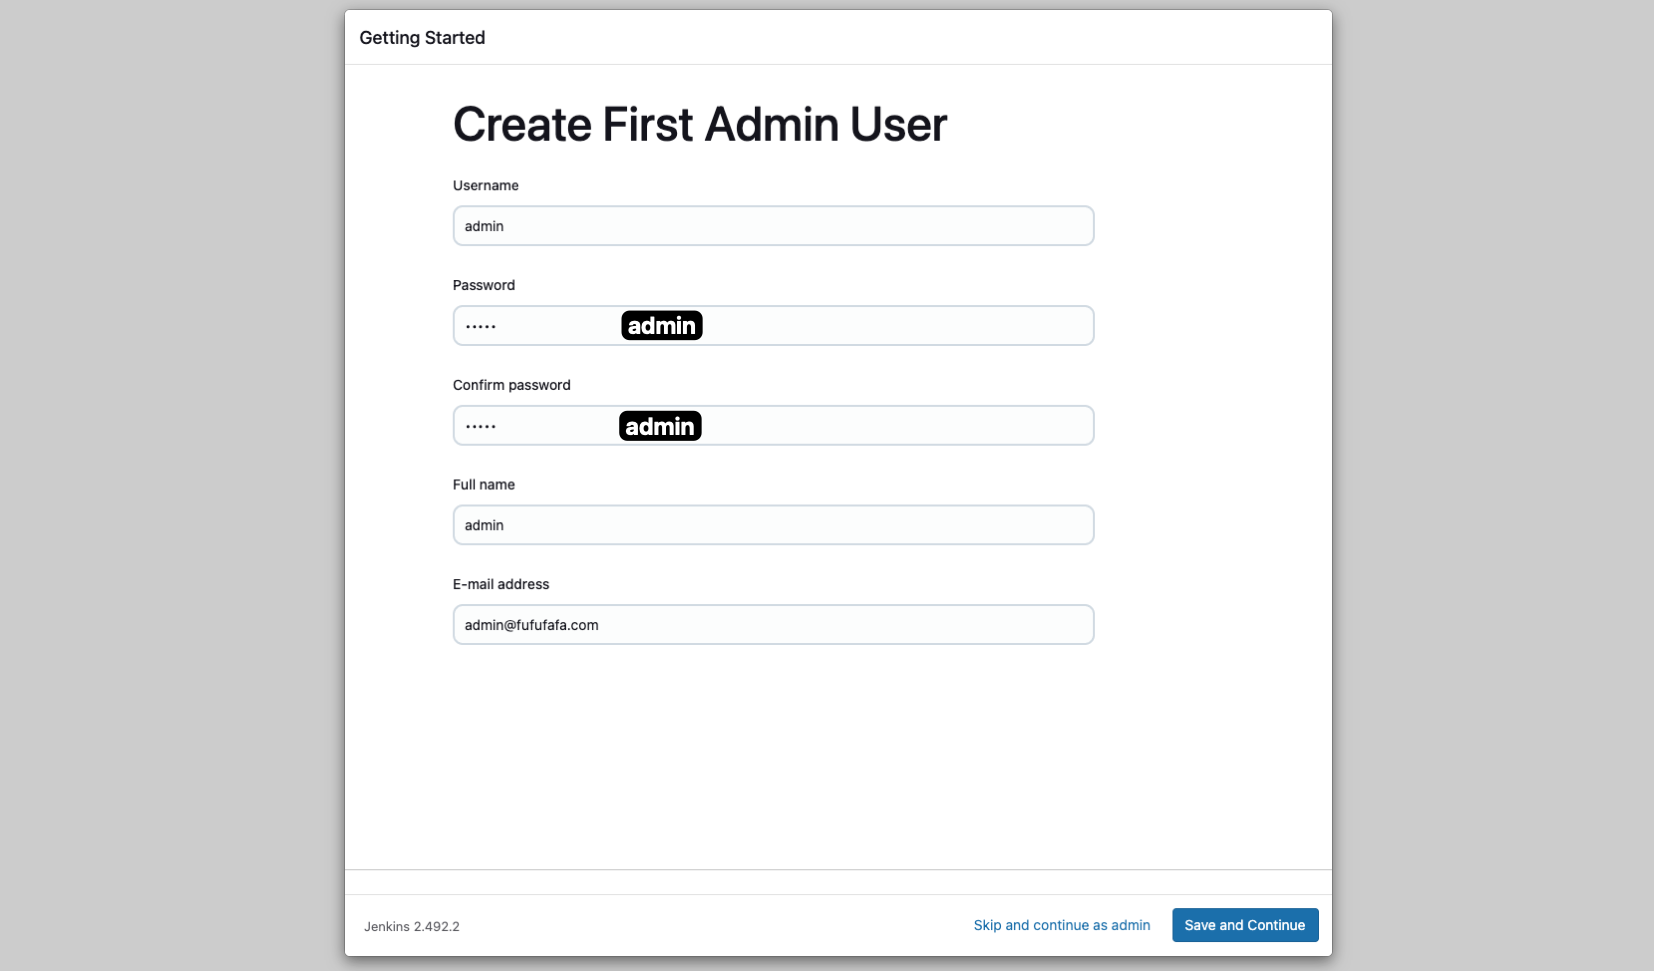
3. Create First Admin User
-
After installing the plugins, you will see the following screen. You can create your first admin user or skip this step. For this tutorial, we will create a first admin user.
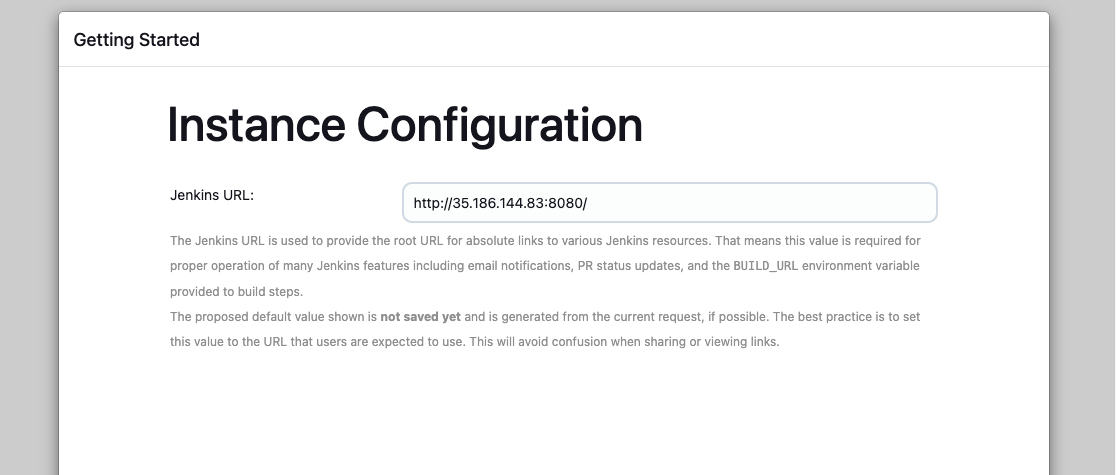
4. Instance Configuration
-
After creating the first admin user, you will see the following screen. You can configure the instance name and URL. For this tutorial, we will use the default settings.
Good! Now we have successfully installed Jenkins on GCP using Terraform.

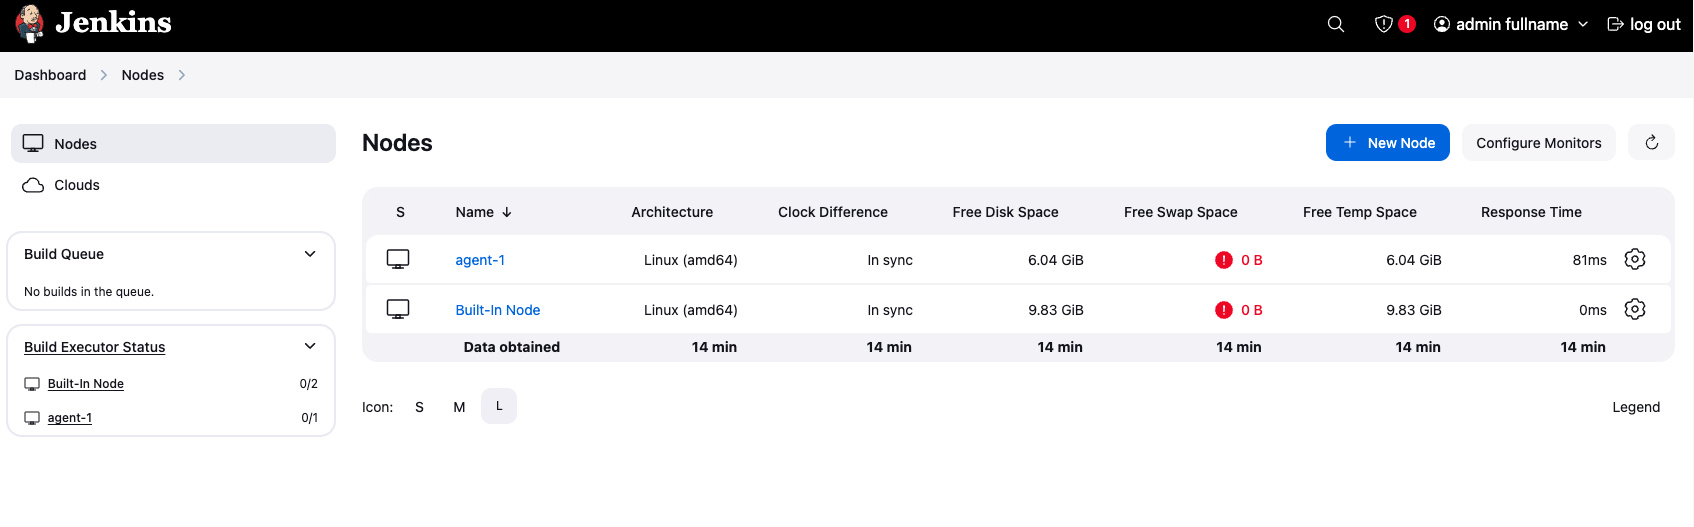
2. Setup Agent
This is a Jenkins configuration page for setting up a node (agent) to connect to the Jenkins controller:
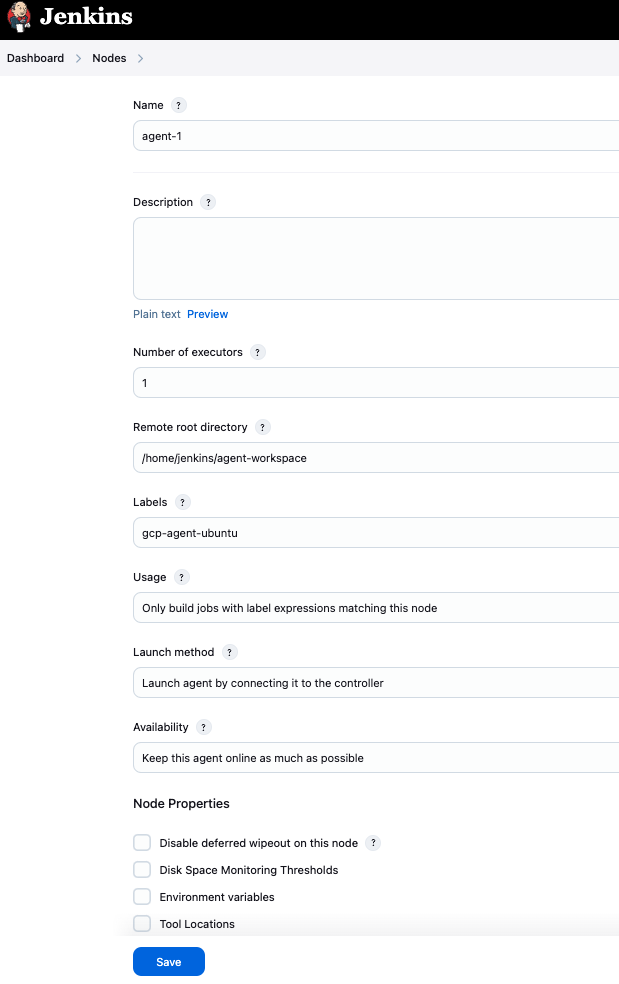
Key Fields:
- Name:
agent-1
The unique identifier for this agent in Jenkins. - Labels:
gcp-agent-ubuntu
Labels are used to categorize the agent. Jobs can be configured to run on agents with specific labels. Here, the agent is tagged as a GCP VM-based Ubuntu agent. We can use this label to run jobs on this agent.
Connection Details
- Launch Method: Launch agent by connecting it to the controller
The agent will initiate the connection to the Jenkins controller (not the controller connecting to the agent). - Remote root directory:
/home/jenkins/agent-workspace
The directory on the agent where Jenkins will store its workspace and job-related files.

Plugins
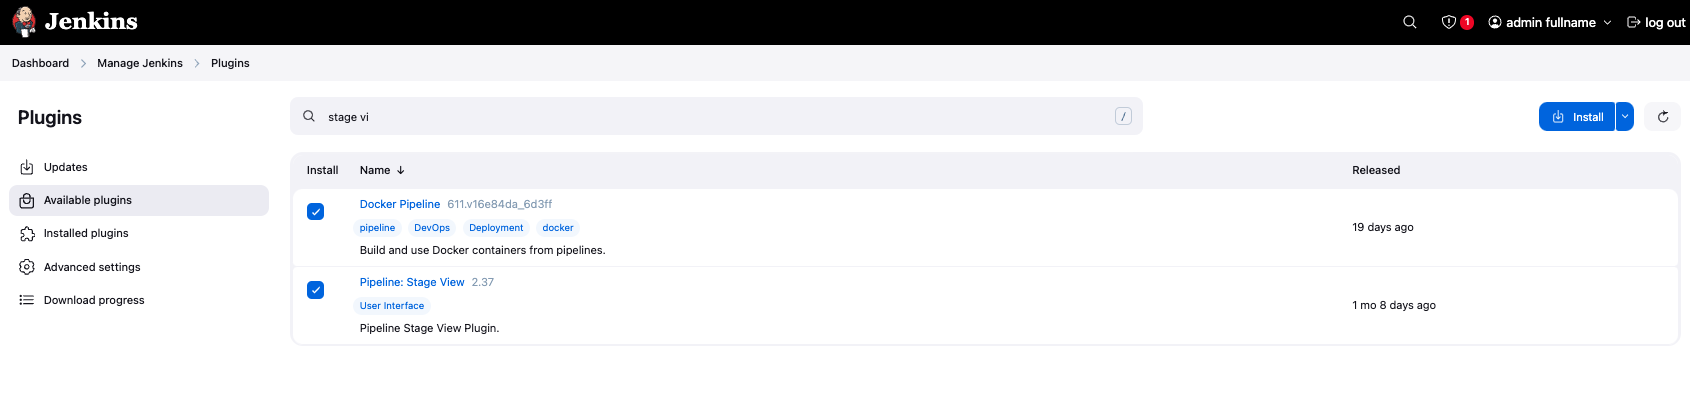
In this process I installed 2 plugins:
- Docker Pipeline Plugin:
- This plugin provides a set of steps to build and run Docker containers in Jenkins pipelines. It allows you to use Docker as a build environment and run your jobs inside Docker containers.
- Pipeline: Stage View Plugin
- This plugin provides a visual representation of the stages in your pipeline. It allows you to see the progress of your pipeline and the status of each stage.
Create a First Job
1. Create a Pipeline Job
- After installing the plugins, you will see the following screen. You can create a new job by clicking on the "New Item" button. Here i fill the form by selecting "Pipeline" and enter the name of the job. For this tutorial, we will create a job called
check-disk.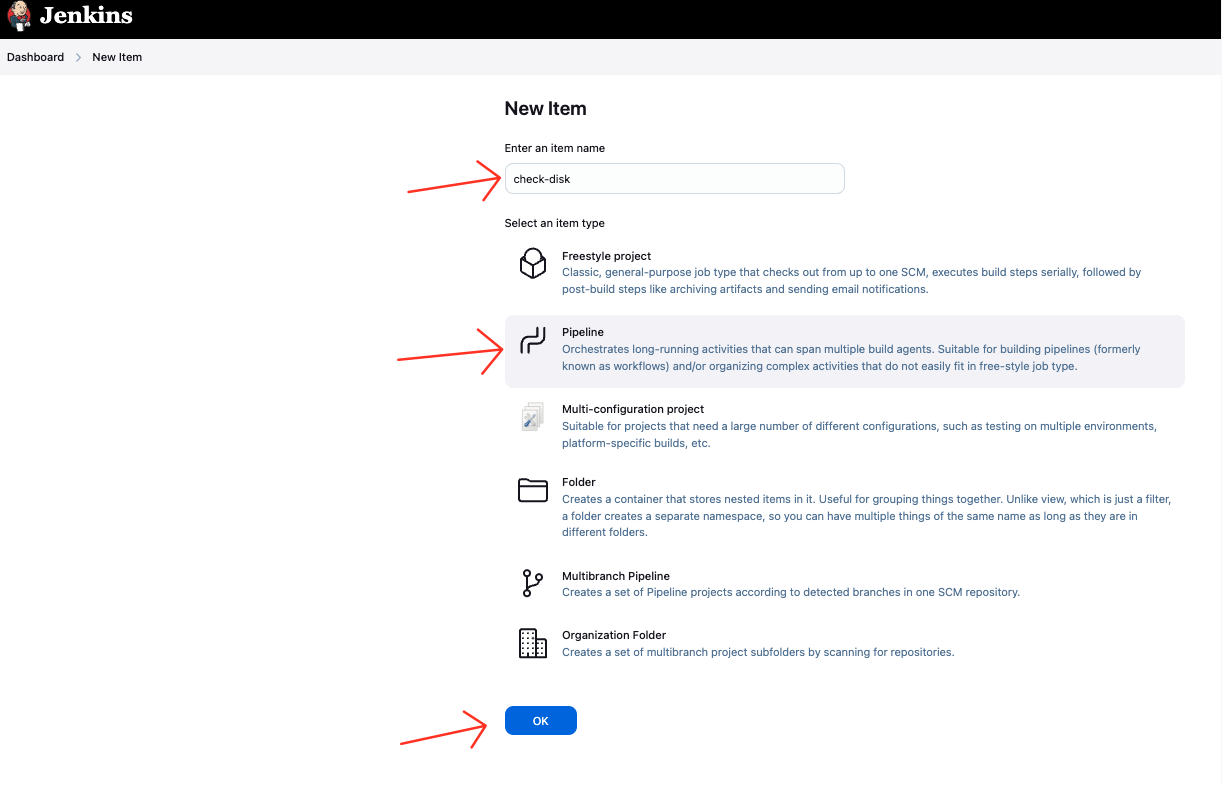
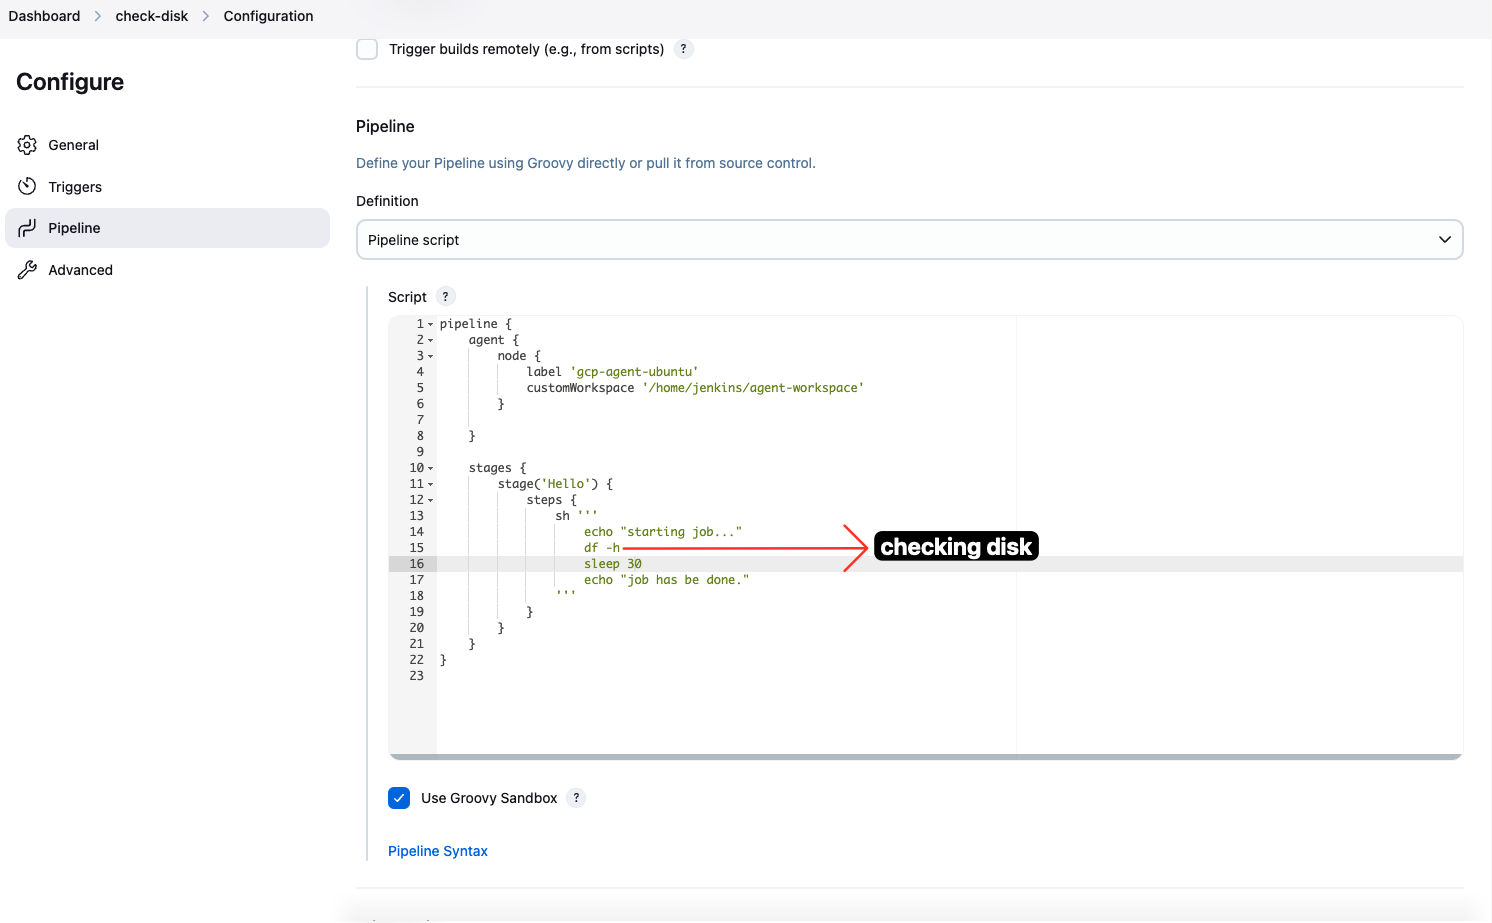
2. Create a script to check disk space
-
Then we need to write a script to check disk space. We will use the
shstep to run the script. The script will check the disk space and print the result to the console. Here is the script:Jenkinsfile - We will use the
gcp-agent-ubuntuagent to run the job. This is the name of the Jenkins Agent VM that we created earlier. - We will use the
/home/jenkins/agent-workspacedirectory as the workspace for the job. This is the directory where the job will run. - The
df -hcommand will check the disk space and print the result to the console. - The
sleep 30command will wait for 30 seconds before finishing the job. This is just to simulate a long-running job.
I save the script and click on the Build Now button to run the job. We can see the job status on the left side of the screen.
- We will use the
3. Console Output of the Job
-
After executing the job, we can see the console output of the job. We can see the output of the
df -hcommand and the status of the job. The job will run on the Jenkins Agent VM and print the result to the console. Here is the console output: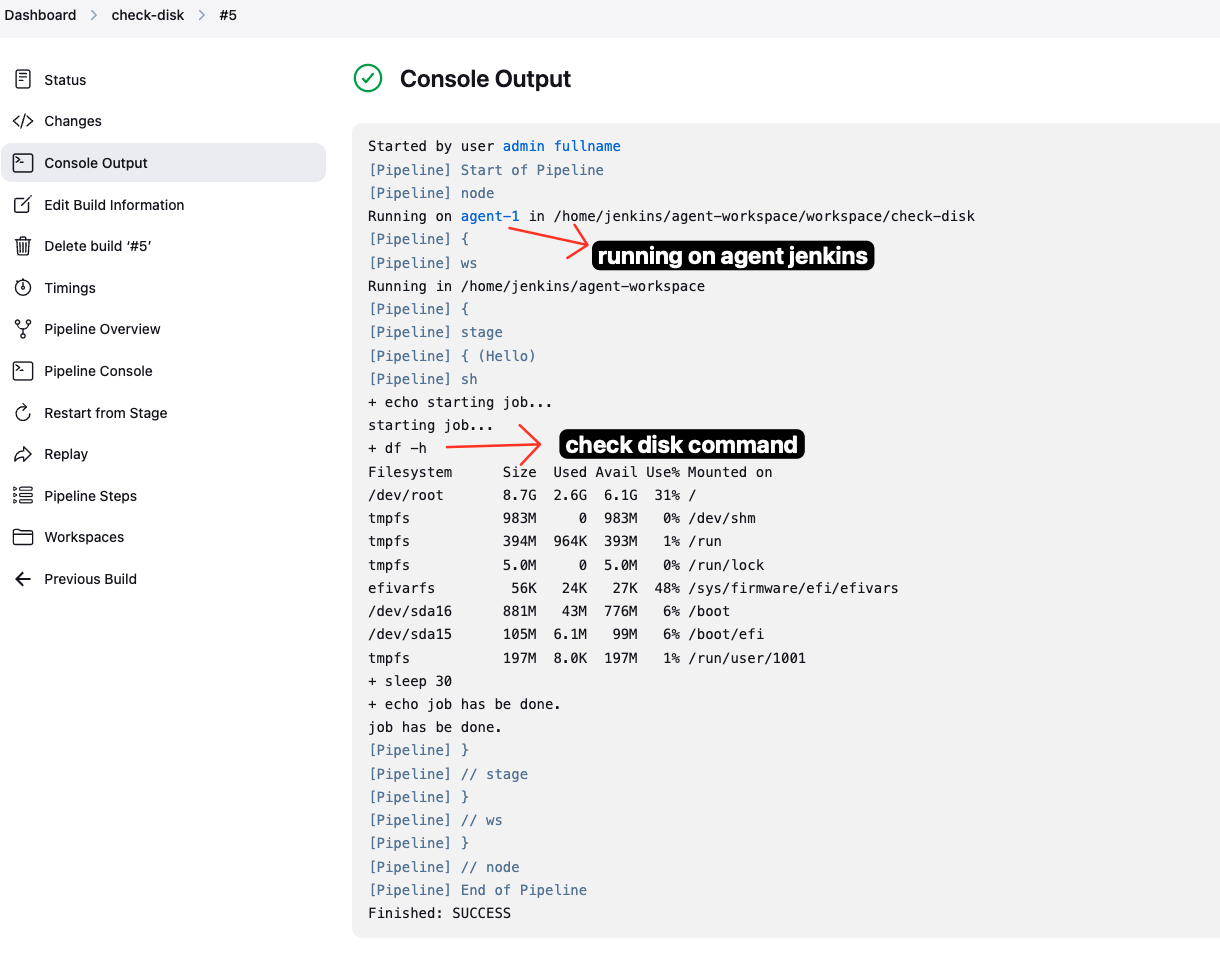
4. See log history of the job via Stage View Plugin
- After executing the job few times, we can see the log history of the job, this is provide by
Stage View Plugin. We can see the status of each stage and the time taken for each stage. This is a very useful feature to monitor the progress of the job and troubleshoot any issues.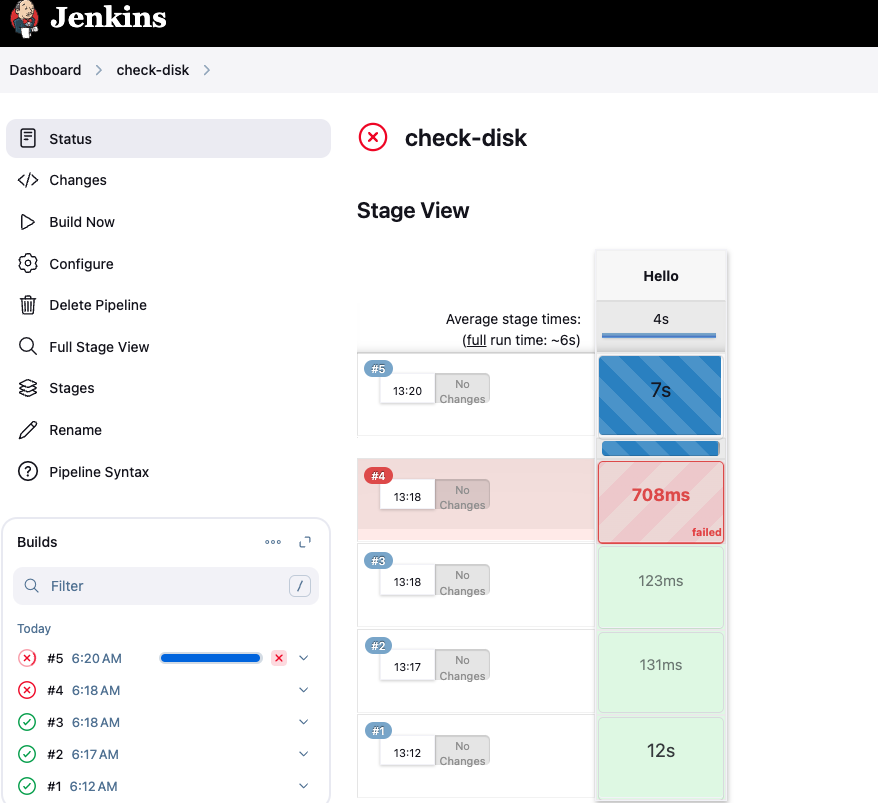
Conclusion
Today i learned how to:
- install Jenkins Controller and Jenkins Agent on GCP using Terraform
- install Jenkins plugins to enhance Jenkins functionality
- create a simple job to check disk space
However still much 🔥 to learn about Jenkins and its features. I will continue to explore Jenkins and its capabilities in the next posts.
Thank you for reading this post. I hope you find it helpful. If you have any questions or feedback, please feel free to leave a comment below. I will be happy to help you.