Hands-On Setup NginX with Ansible
I will do hands-on Ansible with this project.
Project Challange
- Siapkan 3 server untuk ansible di virtualbox, 1 Control Node dan 2 Managed Node
- Install Ansible di Control Node
Notes
I change the project to use 3 VM in GCP, 1 Control Node and 2 Managed Node
Overview
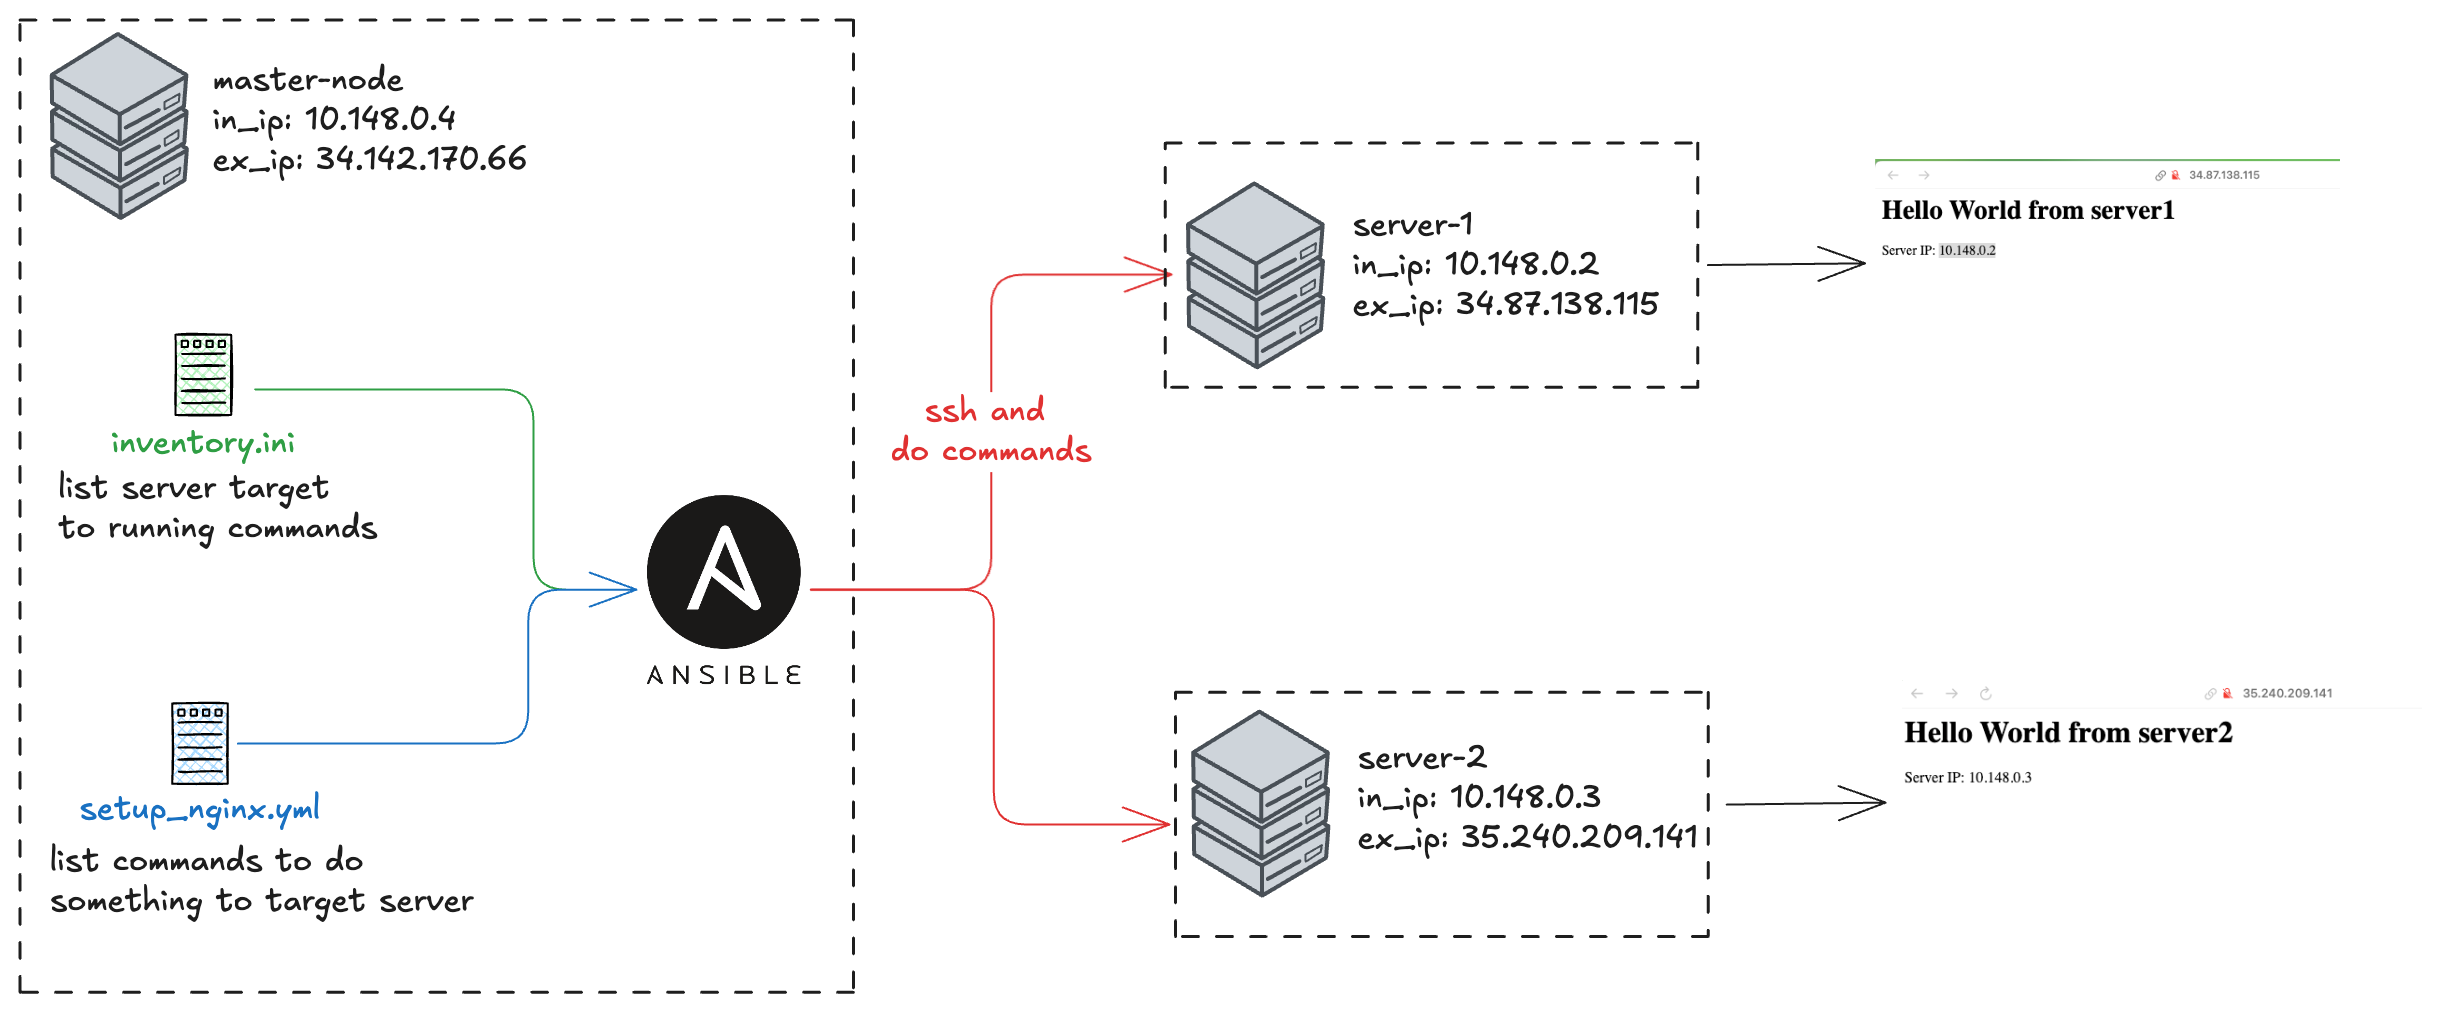
I have master-node here as control node and server-1 and server-2 as managed node. Master node will be used to install Ansible and run the playbook. server-1 and server-2 will be used to setup nginx.
Setup VM Instance in GCP
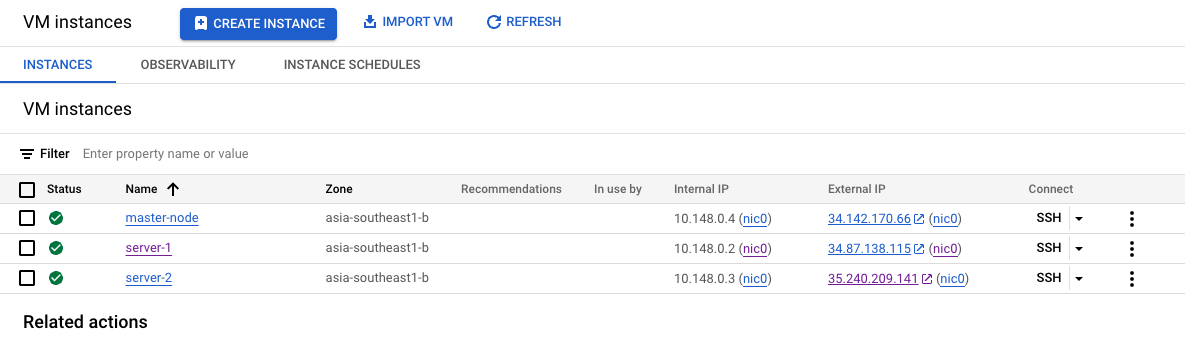
List of VM instances created in GCP.

Successfully ssh into 3 VM instances in GCP.
| master-node | server-1 | server-2 | |
|---|---|---|---|
| Internal IP | 10.148.0.4 | 10.148.0.2 | 10.148.0.3 |
| External IP | 34.142.170.66 | 34.87.138.115 | 35.240.209.141 |
| OS | Ubuntu 24.04 LTS | Ubuntu 24.04 LTS | Ubuntu 24.04 LTS |
| Network | Allow HTTP | Allow HTTP | Allow HTTP |
Setup Powerless SSH
Generate SSH Key on Master Node:
Paste the Public Key to GCP Metadata SSH Keys:
Copy the public key to your clipboard and paste it in the GCP Metadata SSH Keys (like the image below).

Setup passwordless SSH by generating SSH key on master node and registering the public key to Metadata Compute Engine on GCP.
Success Setup Passwordless SSH 
Now master-node can SSH to server-1 and server-2 without password
Introduction to Ansible
Ansible is open-source automation tool that can be used to manage configuration, deploy applications, and run tasks on single or multiple servers. The way it works is by using SSH to connect to the target servers and execute tasks defined in a playbook.
There are several key concepts in Ansible that you need to understand before getting started:
- Inventory: A file that contains a list of servers to be managed by Ansible. This file can be in INI or YAML format.
- Playbook: A YAML file that defines the tasks to be executed on the target servers. Playbooks are the heart of Ansible automation.
- Module: A script that performs a specific task (e.g., installing a package or managing a service). Ansible has many built-in modules that you can use in your playbooks.
Setup Ansible on Master Node
Steps:
-
Update Package List:
-
Install Ansible:
-
Check Ansible Version:
Create Inventory and Playbook
Inventory File
Inventory file is a file that contains a list of servers to be managed by Ansible. This file can be in INI or YAML format. In this example, we will use the INI format.
Details .ini file
- [servers]: This is a group name that contains the servers you want to manage.
- server1 ansible_host=...: This line defines a server in the group.
server1is the alias you will use in your playbook, andansible_hostis the actual IP address of the server.
Playbook File
Details setup_nginx.yml file
Playbook Header
| setup_nginx.yml | Header | |
|---|---|
- Purpose: Defines the playbook and its target
-
Components:
name: Playbook title for identificationhosts: Targets the "servers" group from inventory filebecome: yes: Grants sudo privileges for all tasks
Tasks Section
Task 1: Update APT Cache
- Purpose: Refreshes the package manager's cache
-
Module:
apt -
Parameters:
update_cache: yes: Triggers refresh of APT package lists
Task 2: Install Nginx
- Purpose: Installs Nginx web server
- Module:
apt - Parameters:
name: nginx: Specifies the package to installstate: present: Ensures Nginx is installed (won’t remove if already present)
Task 3: Start and Enable Nginx
| setup_nginx.yml | Task 3 | |
|---|---|
- Purpose: Configures Nginx service
- Module:
service - Parameters:
name: nginx: Targets the Nginx servicestate: started: Ensures Nginx is running nowenabled: yes: Makes Nginx start automatically on boot
Task 4: Get Server IP Address
| setup_nginx.yml | Task 4 | |
|---|---|
- Purpose: Retrieves server's IP address
- Module:
command - Parameters:
hostname -I: Runs command to get IP(s)register: server_ip: Saves output toserver_ipvariablechanged_when: false: Marks task as not changing system state
Task 5: Create Custom HTML Page
| setup_nginx.yml | Task 5 | |
|---|---|
- Purpose: Creates Nginx welcome page
- Module:
copy - Parameters:
content: Defines HTML with dynamic values:{{ inventory_hostname }}: Inserts server’s hostname{{ server_ip.stdout }}: Inserts IP from Task 4
dest: /var/www/html/index.html: Sets file path for HTMLmode: '0644': Sets permissions (read/write for owner, read for others)
Workflow Summary
- Refreshes package cache
- Installs Nginx
- Starts Nginx and enables it on boot
- Captures server IP
- Creates HTML page with hostname and IP
Run the Playbook
Now it's time to run the automation!
Steps:
- Ensure You Are in the Ansible Directory:
-
Ping the Servers:
This command checks if Ansible can connect to the servers. If successful, you will see a "pong" response.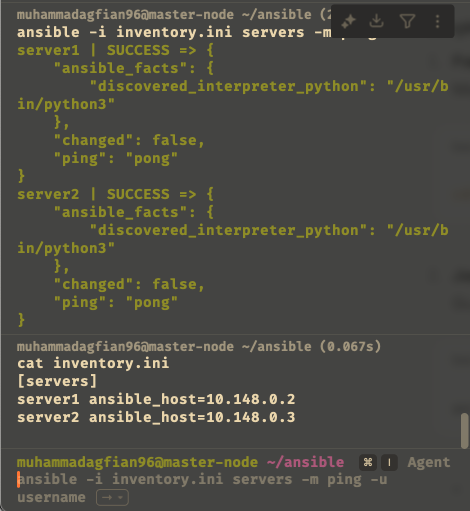
Picture show that ansible can connect to the servers and get a pong response.
-
Run the Playbook:
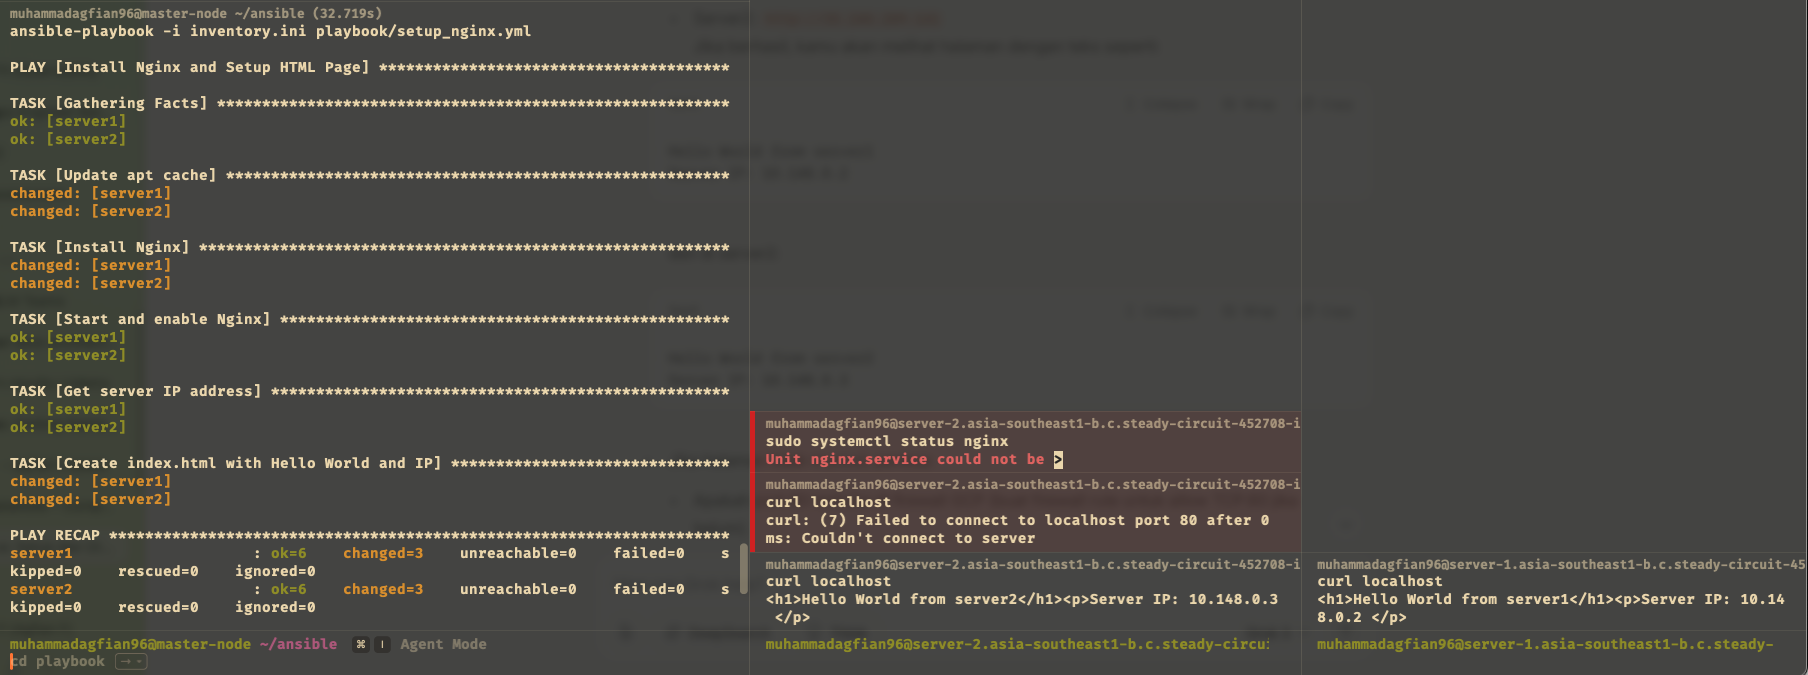
The picture show that ansible can connect to the servers and run the playbook to install nginx.
master-node (left) successfully run the playbook to install nginx on server1 (left) and server2 (middle). I running
curl http://localhostto managed node to check if nginx is running and successfully return the HTML page created by the playbook.
Verify the Nginx Installation
Steps:
-
Open a Web Browser:
- Go to
http://<server1_external_ip>andhttp://<server2_external_ip>. - You should see the "Hello World" message with the server's IP address.

Successfully open the web browser and see the Hello World message with the server's IP address.
- Go to
-
Check Nginx Status:
- This command checks if Nginx is running on server1.
- This command checks if Nginx is running on server1.
What's Next?
Learning Ansible is a great way to automate tasks and manage configurations. You can explore more advanced features like roles, templates, and dynamic inventories to enhance your automation skills.
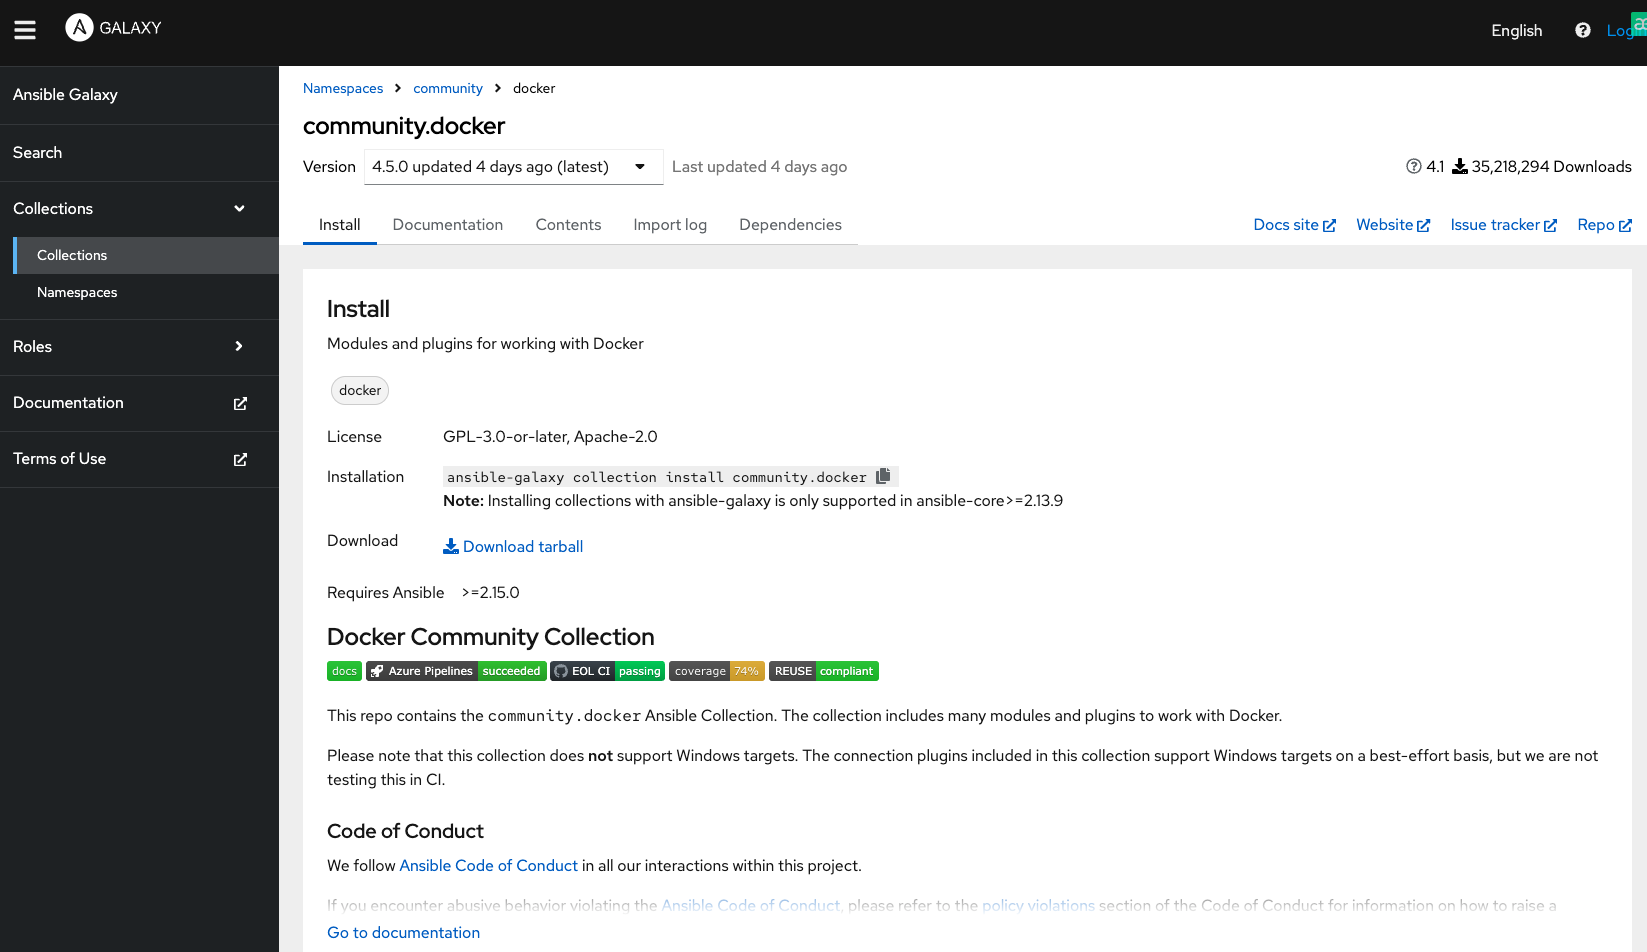
Ansible Galaxy
Ansible Galaxy is an online platform provided by the Ansible community to share automation content like roles and collections. It’s like an "app store" for Ansible, where you can find and download pre-built code for specific tasks, such as installing Docker.
- Roles: A bundle of tasks, variables, and files packaged to perform a specific function, like installing Nginx.
- Collections: Larger packages that can include multiple roles, modules, or plugins for more complex needs.
Example: Steps to Install Docker Collection
- Install Ansible Galaxy:
-
Verify Installation:
-
Create a Playbook:
playbook/install_docker.yml Details
install_docker.ymlfile- hosts: servers: Target the "servers" group.
- become: yes: Use sudo.
- Task:
- Module:
community.docker.docker_host. So it means that this module is from thecommunity.dockercollection. We don't need to manually install from scratch. - Parameters:
- state: present: Ensure Docker is installed.
- version: "20.10": Specify the Docker version (change as needed, e.g., "24.0").
- Module:
-
Run the Playbook:
Why use Ansible Galaxy?
- Saves time since we don’t need to write code from scratch.
- Community-supported, so the code is usually tested and reliable.
Conclusion
In this project, i learned how to set up Ansible, create an inventory file and playbook, and run the playbook to install Nginx on multiple servers. I also learned about Ansible Galaxy and how to use it to install Docker.